Saturday, August 21, 2010

Gum Bichromate - Ballerina


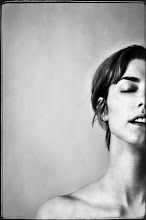
I think ballerinas are such a wonderful symbol for grace, dignity, and discipline. I love how they move. One of my dear friends is a ballerina. She is one of my favorite subject matters to photograph. I printed these Gum Bichromate pictures as a birthday present for her, and as a thank you for all the hours she has spent with me over the last couple of years modeling in the studio. I picked a soft, silvery color for my paint as a representation of the way I view ballerinas: gentle, subtle and eloquent.

Monday, August 9, 2010

Image Transfers on Wood


I made this book for a friend of mine who works at the university I attend. He had made some comments earlier that got me thinking about how he could use a nice gift in his life lately. So with the help of my teacher we were able to borrow his well-beloved cowboy outfit and photograph it.
I photographed these images with a 4x5 large format camera. It was the first time I had ever used one before. My teacher let me use hers and went out photographing with me so she could teach me how to use it (I loved it so much a couple weeks later I bought my own ;).
Besides learning how to use a 4x5 camera, I was also interested in learning some new book binding techniques. I decided I was going to make my friend a handmade book with the images I took. I choose wood as the substrate because I wanted to play with new materials and I thought it fit the cowboy theme. I scanned the images on the computer,printed them off and transferred them onto wood. I stitched it with a green thread and have a belt around it to seal it closed.

Wednesday, August 4, 2010

Photographic Toning with Kool-Aid


I wanted to experiment with homemade photographic toners, so I bought a package of red and blue kool-aid. I mixed each package with a little bit of water. I then transferred some laser prints onto a heavier paper. I placed the images (or sometimes just sections of the images) in the two separate colors for about 30 seconds. I am happy with how it turned out. I am planning on making a toning journal where I have a collection of different types of papers with different types of toners as a reference for future projects. I think toning an image can add a lot to a print.

Thursday, July 29, 2010

Book Review: "Photographic Possiblities" by Robert Hirsch

An excellent book I just finished reading:


5 out of 5 Stars


This book is fantastic! It is laid out in textbook format, but don't let that intimidate you. It is well worth reading!
The first note to make about this book is that its focus is more directed towards photographers working with film. This book covers topics such as: paper and negative developers, photographic toners, specialty films and cameras, and how to mix and store chemistry. It also has an excellent opening chapter about what photography is and pushing the boundaries of art making.
The author, Robert Hirsch, also wrote a lengthy chapter about historic processes. This chapter was the main reason I bought the book. I picked up quite a few helpful tips for coating paper and what substrates work with different processes. I felt the information was adequate enough to at least begin experimenting with these processes, though I sometimes wished he'd gone into more depth. I learned about a new process called gumoil that I am very excited to try and already have a project in mind for it.
Overall I found this book to be very informative. Hirsch is very thorough in the information given. He lists recipes for: making toners, chemistry for historic processes, as well as film and paper developers. He explains in detail what the different chemicals do and why they are needed. He tells what the different visual results will be depending on what type of developer is used. (For example, with film he specifies how each developer will effect the grain size, contrast, etc). He also gives a lot of resources, such as: introducing a wide range of working artists, websites to buy supplies and chemicals, websites for more information about the topic, and a long list of resource guides at the end of each chapter, including other books.
One of the things I liked the best is that this book is filled with beautiful photographs from a wide range of artists. Often he would use the photographs as examples of what he was talking about by using artists who used a certian processes or developer or technique. Also the images would have quotes from the artists that not only explained their technique but also talked about what their art means or why they made it. I love that! It was kind of like little artists statements with each photograph.
The one thing I found most disappointing was the description of how to make digital negatives. I felt like he really skimmed over the concept. He did not give much detail about it. He mentioned the need to change the curves in Photoshop and what to change it to depends on the process you are working with. But then he gave no information about what the curve settings need to be. All he did was reference an artist's website, Dan Burkholder, who has written a book about making digital negatives. So, I guess if you don't already have the curves and information you need, you might want to look into buying the other book, too. Maybe he felt like it was too much information to try and add to his book. But I did take note that for someone who doesn't have experience with making digital negatives, they will probably get lost when making one if they are only going off the information he provided.
My final critique of the overall quality, clarity, information, and inspiration of this book is that it is excellently executed. I felt very inspired by it. I wrote a long lists of ideas to try that I gained from reading this book. I was really influenced by the artists' works and writings. I felt like I gained a lot of insight into the art making process. I learned things about photography I did not know, especially new darkroom techniques. This book is a resource I plan on referring to often. I recommend it to any serious artists working with film, darkroom techniques, or historic processes. To me, it is a must have!

Tuesday, July 27, 2010

Experimenting With Plexiglass


This is an image of my husband, Devon Harbaugh. I was working on two projects when I made this piece. The first project, I was trying to figure out a good way to convey the concept of layers building upon itself. With the other project, I was playing with the idea of making a book out of plexiglass. I wanted it so that you could look through all the pages and see a final image, but that you could also flip through the pages as you would a book.
When all the pages were put together, I loved how it looked, but each individual piece was not strong enough to hold interests as you looked at them by themselves. I still need to explore that concept with a different approach and subject matter.
As far as the other project goes with building up layers, it wasn't quite the right look I was going for. I think this project looks more broken and pieced back together than individual layers built up to make a whole. I found a different way to resolve my layers piece, much different than how this turned out. But I think this approach has great potential for future concepts and projects. What is your critique and feeling about this picture?

Wednesday, July 21, 2010

Book Review: "Encaustic Workshop" by Patricia Baldwin Seggebruch

Another book i just finished reading:


3.5 out of 5 Stars


I read this book because I am interested in mixed media techniques and have played some with wax and wanted to learn more. This book covers some basic techniques and ideas for working with beeswax as an artistic medium. I wouldn't suggest this book for someone who is seriously interested in learning the traditional techniques of encaustic painting. In terms of how to paint with encaustic, the information was limited. But if you are a mixed media artists or are always looking for new techniques this is a fabulous resource to have in your library.

Patricia takes a very alternative approach using beeswax as a form of art. This book explores carving the wax, adding watercolor, transferring images, adding found objects, cloth and papers, and even burning shellac on the wax. She even has a chapter at the end with tips, examples, and ideas for how to present or frame your encaustic work.

The step by step images for all her technique examples seemed clear and easy to follow. However, I didn't care much for the examples of the finished art that were given throughout the book. Most of them I found to be uninspiring and as far as I could tell there was no real concept to any of her work, which was a disappointment. She made only a few references to concept throughout the whole book!

She did have some interesting techniques that sparked my interested, though. There was an example she showed where she bleached black paper. It looks like it has a lot of potential to create beautiful things. I am also interested in trying the shellac and watercolor techniques.

Here are the examples of these techniques. I photographed them from the book:

Bleaching Technique


Shellac Technique


Watercolor Technique


And now for my two cents about what I have observed from this book and in my own experience: I have found that when it comes to working with beeswax often times simpler (an image with a few accents and a couple layers of wax) is better...unless you want to go for a more abstract look. When I am trying to use photographs as the main focus and I am adding sand and twigs and paint and text and so on, it just never seems to come out correctly. It usually comes out looking cluttered or disorganized or scrapbooky. I think working with encaustic has a delicate balance between being a cohesive, strong piece of art and being a mess, boring, or having disconnected elements.
But, like I briefly mentioned before, when it comes to abstract work there is a lot of potential. There are many great textures and colors possible through the layering techniques of wax. In general I have found that I like the beauty and mood of abstract work with mixed media encaustic more then something that has a recognizable subject matter. An abstract approach with encaustic can create some very beautiful, visually interesting art.
On a final note, an important tip I discovered: when using photographs make sure the background surface is white, not wood/dark colored because it will darken your natural image a lot as your image becomes partly transparent from the wax.

Tuesday, July 20, 2010

Great Horned Owl


About 4 or 5 days ago very late at night I spotted a Great Horned Owl perched on a telephone pole. It was hard to see it because of how dark it was, but I was very excited about it none-the-less. I love owls and they are one of my favorite birds. Yesterday I went to photograph at the Arboretum in a neighboring town, and right when we got there, around dusk, an owl flew right above my head. I watched where he perched and was able to take some photos of him. Unfortunately the lighting was dim, so I had to bump up my ISO (which causes graininess/fuzziness) and slow my shutter speed down (which causes motion blur). So even though they aren't perfect pictures (and I can't afford a $5,000-$10,000 telephoto, fast, birding lens), I am still happy I was able to get them!